[Bor] LXC Samba
La LXC Samba va nous permettre de proposer un service de stockage aux associations tout en isolant le service pour plus de sécurité et de cloisonnement.
Présentation
| Type | Linux Container (machine virtuelle) hébergée sur Bor |
|---|---|
| Utilité | Service de stockage du GINFO |
| Services | Stockage associatif |
| OS | Ubuntu Server 17.04 |
| Nom du LXC | bor_samba |
| IP | 10.61.15.24 (DMZ BOR) |
Création de la LXC sur BOR
Pour créer le Linux Container, je vous invite à suivre la seconde partie du tutoriel disponible sur cette page : Créer un Linux Container (LXC)
La seule chose à respecter lors de la création du container est le nom que vous lui donnerez : bor_samba
Configuration de la LXC
En suivant le précédent tutoriel pensez à :
→ attribuer une IP fixe au LXC (cf tutoriel LXC)
→ la mettre en démarrage automatique au démarrage de Bor
→ Ajouter une règle NAT pour permettre au LXC de communiquer avec l'extérieur via les ports entrants 137, 138, 139, 445 en TCP sur Bor
Configuration du serveur Samba
Avant toute chose, mettez vous en root sur le LXC : su root
L'installation de Samba est simple mais un peu longue. Voici les étapes :
On installe samba et ses dépendances :
$> apt-get install samba
$> apt-get install samba-common-bin
Chaque association aura accès à deux dossiers :
→ Son dossier personnel
→ Un dossier commun à toutes les assos
On commence par créer un groupe d'utilisateur associations
$> groupadd associations
Ajoutons maintenant un utilisateur, par exemple fablab, au groupe :
$> useradd -m -g associations fablab
Le paramètre -m permet la création automatique du répertoire personnel de l'utilisateur dans /home/nom_utilisateur. Le paramètre -g permet d'ajouter l'utilisateur au groupe spécifié.
Ensuite, on va lier l'utilisateur à Samba via la commande suivante :
$> smbpasswd -a fablab
La commande va vous demander de rentrer un mot de passe (et de le confirmer). C'est ce mot de passe qui permettra au client de se connecter au serveur Samba.
On crée maintenant le dossier commun aux associations, qui ne sera accessible que par les membres du groupe associations
$> mkdir /home/associations
On crée ensuite un utilisateur linux sambaadmin pour gérer les dossiers et on lui donne les droits. Aussi, on donne les droits au dossier association au priopriétaire (i.e : sambaadmin) et aux membres du groupe (ie : associations)
$> useradd -m -g associations sambaadmin
$> chown -R sambaadmin:associations /home/associations
$> chmod -R 770 /home/associations
On passe maintenant à la configuration, on sauvegarde le fichier de config par sécurité :
$> cd /etc/samba
$> cp /etc/samba/smb.conf /etc/samba/smb.conf.save
$> nano smb.conf
En dessous de workgroup on écrit ceci :
workgroup = WORKGROUP
security = user
netbios name = SERVEUR-GInfo-BOR
Nous allons décommenter les parties qui nous intéressent comme ceci (i.e : enlever les “;”) : et modifier read only à no :
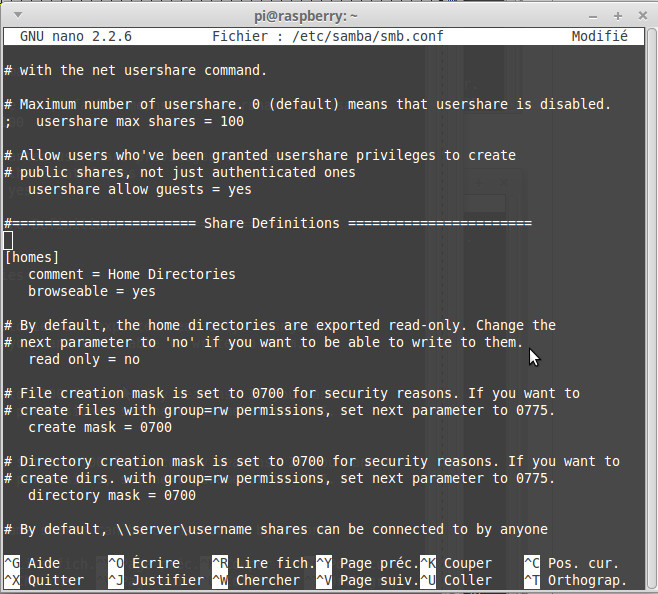
Les clients ont donc accès à leur répertoire personnel dans home, il ne nous reste plus qu'à configurer les répertoires partagés :
A la fin du fichier on ajoute :
[associations]
path = /home/associations
comment = répertoire accessible uniquement pour le groupe associations
valid users = @associations
browseable = yes
read only = no
writable = yes
directory mask = 0770
create mask = 0770
La configuration complète est disponible ici
- /etc/samba/smb.conf
#
# Sample configuration file for the Samba suite for Debian GNU/Linux.
#
#
# This is the main Samba configuration file. You should read the
# smb.conf(5) manual page in order to understand the options listed
# here. Samba has a huge number of configurable options most of which
# are not shown in this example
#
# Some options that are often worth tuning have been included as
# commented-out examples in this file.
#  - When such options are commented with ";", the proposed setting
#    differs from the default Samba behaviour
#  - When commented with "#", the proposed setting is the default
#    behaviour of Samba but the option is considered important
#    enough to be mentioned here
#
# NOTE: Whenever you modify this file you should run the command
# "testparm" to check that you have not made any basic syntactic
# errors.

#======================= Global Settings =======================

[global]

## Browsing/Identification ###

# Change this to the workgroup/NT-domain name your Samba server will part of
   workgroup = WORKGROUP

   netbios name = SERVEUR-GINFO-SAMBA
# server string is the equivalent of the NT Description field
	server string = Associatif
	security = user

# Windows Internet Name Serving Support Section:
# WINS Support - Tells the NMBD component of Samba to enable its WINS Server
#   wins support = no

# WINS Server - Tells the NMBD components of Samba to be a WINS Client
# Note: Samba can be either a WINS Server, or a WINS Client, but NOT both
;   wins server = w.x.y.z

# This will prevent nmbd to search for NetBIOS names through DNS.
   dns proxy = no

#### Networking ####

# The specific set of interfaces / networks to bind to
# This can be either the interface name or an IP address/netmask;
# interface names are normally preferred
;   interfaces = 127.0.0.0/8 eth0

# Only bind to the named interfaces and/or networks; you must use the
# 'interfaces' option above to use this.
# It is recommended that you enable this feature if your Samba machine is
# not protected by a firewall or is a firewall itself.  However, this
# option cannot handle dynamic or non-broadcast interfaces correctly.
;   bind interfaces only = yes


#### Debugging/Accounting ####

# This tells Samba to use a separate log file for each machine
# that connects
   log file = /var/log/samba/log.%m

# Cap the size of the individual log files (in KiB).
   max log size = 1000

# If you want Samba to only log through syslog then set the following
# parameter to 'yes'.
#   syslog only = no

# We want Samba to log a minimum amount of information to syslog. Everything
# should go to /var/log/samba/log.{smbd,nmbd} instead. If you want to log
# through syslog you should set the following parameter to something higher.
   syslog = 0

# Do something sensible when Samba crashes: mail the admin a backtrace
   panic action = /usr/share/samba/panic-action %d


####### Authentication #######

# Server role. Defines in which mode Samba will operate. Possible
# values are "standalone server", "member server", "classic primary
# domain controller", "classic backup domain controller", "active
# directory domain controller".
#
# Most people will want "standalone sever" or "member server".
# Running as "active directory domain controller" will require first
# running "samba-tool domain provision" to wipe databases and create a
# new domain.
   server role = standalone server

# If you are using encrypted passwords, Samba will need to know what
# password database type you are using.
   passdb backend = tdbsam

   obey pam restrictions = yes

# This boolean parameter controls whether Samba attempts to sync the Unix
# password with the SMB password when the encrypted SMB password in the
# passdb is changed.
   unix password sync = yes

# For Unix password sync to work on a Debian GNU/Linux system, the following
# parameters must be set (thanks to Ian Kahan <<kahan@informatik.tu-muenchen.de> for
# sending the correct chat script for the passwd program in Debian Sarge).
   passwd program = /usr/bin/passwd %u
   passwd chat = *Enter\snew\s*\spassword:* %n\n *Retype\snew\s*\spassword:* %n\n *password\supdated\ssuccessfully* .

# This boolean controls whether PAM will be used for password changes
# when requested by an SMB client instead of the program listed in
# 'passwd program'. The default is 'no'.
   pam password change = yes

# This option controls how unsuccessful authentication attempts are mapped
# to anonymous connections
   map to guest = bad user

########## Domains ###########

#
# The following settings only takes effect if 'server role = primary
# classic domain controller', 'server role = backup domain controller'
# or 'domain logons' is set
#

# It specifies the location of the user's
# profile directory from the client point of view) The following
# required a [profiles] share to be setup on the samba server (see
# below)
;   logon path = \\%N\profiles\%U
# Another common choice is storing the profile in the user's home directory
# (this is Samba's default)
#   logon path = \\%N\%U\profile

# The following setting only takes effect if 'domain logons' is set
# It specifies the location of a user's home directory (from the client
# point of view)
;   logon drive = H:
#   logon home = \\%N\%U

# The following setting only takes effect if 'domain logons' is set
# It specifies the script to run during logon. The script must be stored
# in the [netlogon] share
# NOTE: Must be store in 'DOS' file format convention
;   logon script = logon.cmd

# This allows Unix users to be created on the domain controller via the SAMR
# RPC pipe.  The example command creates a user account with a disabled Unix
# password; please adapt to your needs
; add user script = /usr/sbin/adduser --quiet --disabled-password --gecos "" %u

# This allows machine accounts to be created on the domain controller via the
# SAMR RPC pipe.
# The following assumes a "machines" group exists on the system
; add machine script  = /usr/sbin/useradd -g machines -c "%u machine account" -d /var/lib/samba -s /bin/false %u

# This allows Unix groups to be created on the domain controller via the SAMR
# RPC pipe.
; add group script = /usr/sbin/addgroup --force-badname %g

############ Misc ############

# Using the following line enables you to customise your configuration
# on a per machine basis. The %m gets replaced with the netbios name
# of the machine that is connecting
;   include = /home/samba/etc/smb.conf.%m

# Some defaults for winbind (make sure you're not using the ranges
# for something else.)
;   idmap uid = 10000-20000
;   idmap gid = 10000-20000
;   template shell = /bin/bash

# Setup usershare options to enable non-root users to share folders
# with the net usershare command.

# Maximum number of usershare. 0 (default) means that usershare is disabled.
;   usershare max shares = 100

# Allow users who've been granted usershare privileges to create
# public shares, not just authenticated ones
   usershare allow guests = yes

#======================= Share Definitions =======================

# Un-comment the following (and tweak the other settings below to suit)
# to enable the default home directory shares. This will share each
# user's home directory as \\server\username
[Homes]
   comment = Home Directorie
   browseable = no

# By default, the home directories are exported read-only. Change the
# next parameter to 'no' if you want to be able to write to them.
   read only = no

# File creation mask is set to 0700 for security reasons. If you want to
# create files with group=rw permissions, set next parameter to 0775.
   create mask = 0700

# Directory creation mask is set to 0700 for security reasons. If you want to
# create dirs. with group=rw permissions, set next parameter to 0775.
   directory mask = 0700

# By default, \\server\username shares can be connected to by anyone
# with access to the samba server.
# Un-comment the following parameter to make sure that only "username"
# can connect to \\server\username
# This might need tweaking when using external authentication schemes
   valid users = %S

# Un-comment the following and create the netlogon directory for Domain Logons
# (you need to configure Samba to act as a domain controller too.)
;[netlogon]
;   comment = Network Logon Service
;   path = /home/samba/netlogon
;   guest ok = yes
;   read only = yes

# Un-comment the following and create the profiles directory to store
# users profiles (see the "logon path" option above)
# (you need to configure Samba to act as a domain controller too.)
# The path below should be writable by all users so that their
# profile directory may be created the first time they log on
;[profiles]
;   comment = Users profiles
;   path = /home/samba/profiles
;   guest ok = no
;   browseable = no
;   create mask = 0600
;   directory mask = 0700

[printers]
   comment = All Printers
   browseable = no
   path = /var/spool/samba
   printable = yes
   guest ok = no
   read only = yes
   create mask = 0700

# Windows clients look for this share name as a source of downloadable
# printer drivers
[print$]
   comment = Printer Drivers
   path = /var/lib/samba/printers
   browseable = yes
   read only = yes
   guest ok = no
# Uncomment to allow remote administration of Windows print drivers.
# You may need to replace 'lpadmin' with the name of the group your
# admin users are members of.
# Please note that you also need to set appropriate Unix permissions
# to the drivers directory for these users to have write rights in it
;   write list = root, @lpadmin

[Associations]
path = /home/associations
comment = repertoire accessible uniquement pour le groupe associations
valid users = @associations
browseable = yes
read only = no
writable = yes
directory mask = 0770
create mask = 0770
Enfin, on redémarre :
$> service smbd restart
Ajouter un utilisateur (sur l'exemple de l'utilisateur "utilisateurtest")
Un dossier /home/utilisateurtest est crée et l'utilisateur utilisateurtest uniquement y aura accès
$> useradd -m -g associations utilisateurtest
$> smbpasswd -a utilisateurtest
Ajout du stockage du PhyTV
Afin que le PhyTv ai accès a son stockage (4To en raid 1), on va monter leur disque dans leur dossier home. Si ce n'est pas déjà fait, on ajoute l'utilisateur phytv sur le LXC :
$> sudo useradd -m -g associations phytv
$> sudo smbpasswd -a phytv
Ensuite, on sort du LXC pour formater et monter le disque : Ctrl a + q , puis on repère le disque du Pho :
$> sudo fdisk -l

Sur BOR, on repère que sdb est le disque 4To, ainsi on le formate :
$> sudo mkfs.btrfs /dev/sdb
Puis sur BOR on monte le volume à la place de leur dossier home dans la lxc :
$> sudo mount /dev/sdb /var/lib/lxc/bor_samba/rootfs/home/phytv
Et enfin, sur BOR, on donne les bonnes permissions pour que le LXC (dont l'utilisateur permission est ici 1005 et le groupe associations 1002, on pouvait repérer ça avant de monter le disque via la commande ls -l) puisse écrire dessus :
$> sudo chown 1005:1002 /var/lib/lxc/bor_samba/rootfs/home/phytv
Maintenant, si sur BOR, vous tapez df, vous devriez voir que le disque est bien monté :
 Maintenant, le Phy aura accès a son second disque mais il faut fixer ça au redémarrage donc sur BOR, on repère l'uuid du disque :
$> blkid /dev/sdb
Puis on ajoute le disque pour qu'il soit monté au démarrage via nano /etc/fstab :
On ajoute la ligne suivante avec le bon UUID :
- Ajouter cette ligne dans /etc/fstab
UUID=c613fcb2-789f-462b-acc1-3cd58c2959bb /var/lib/lxc/bor_samba/rootfs/home/phytv btrfs defaults 0 0
On redémarre et si le disque est bien monté on devrait le voir avec la commande df -h